
Benefit:
Don’t let problematic words slow down your workflow. With User Preferences Spell Check Options, you now have two ways to spell check within the application. Available with v.6.1.1.
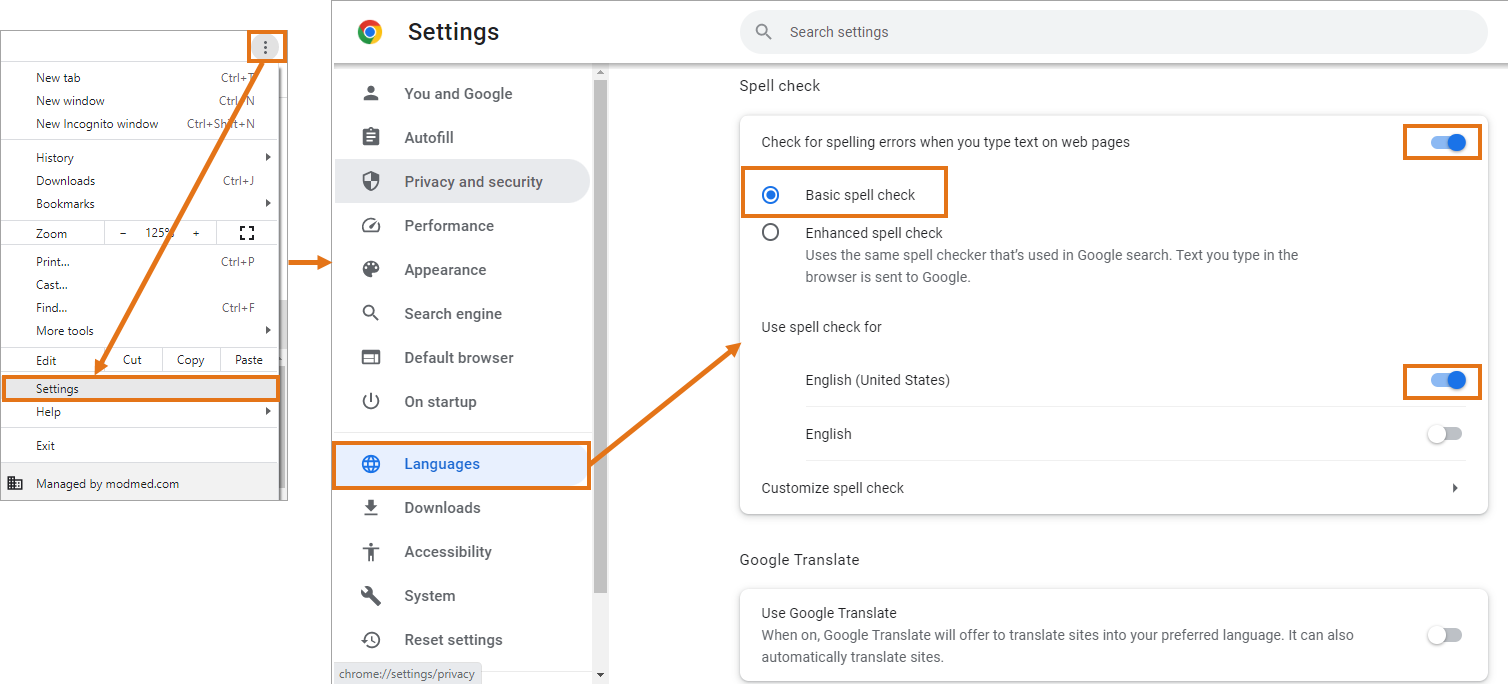
Ensure that Spell Checking is enabled in the browser.
Step 2
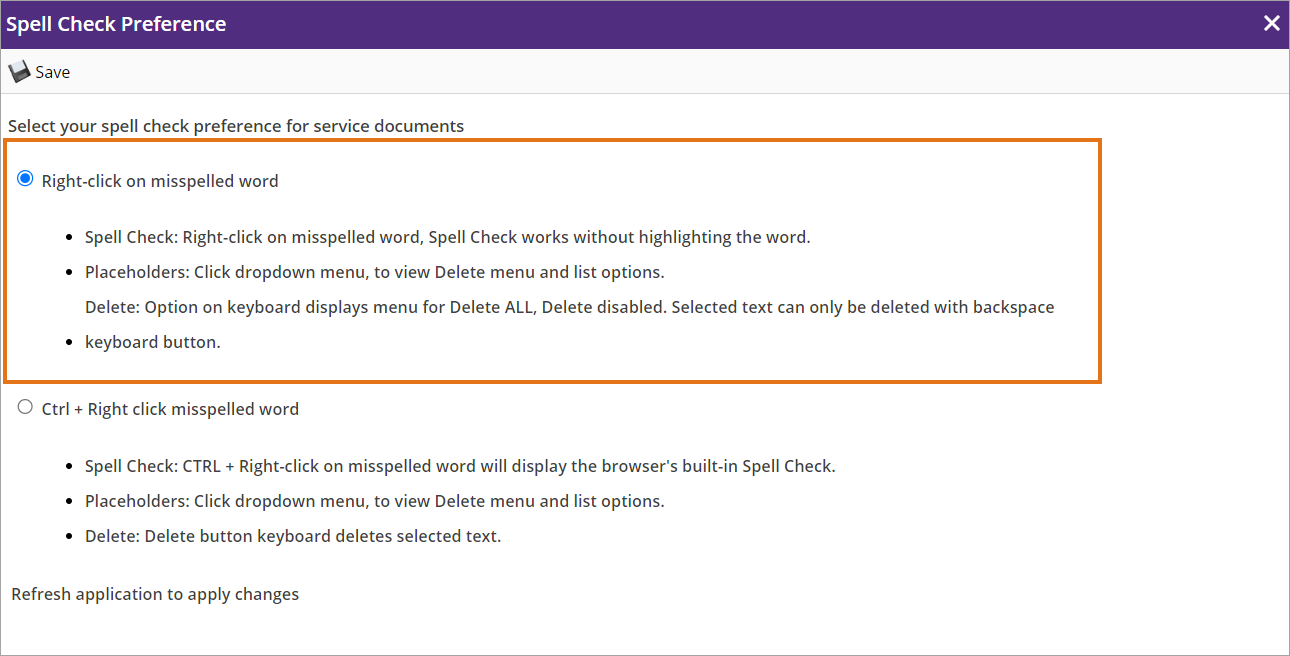
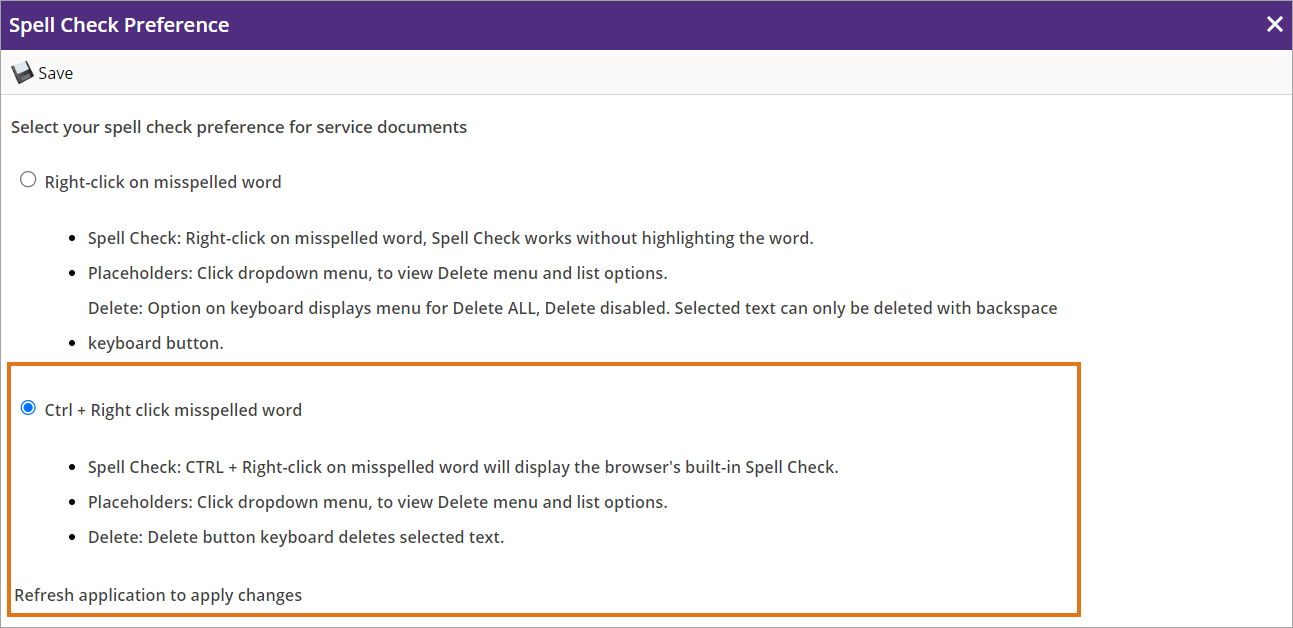
Access User Preferences Document Spell Check.
Select the first option to be able to:
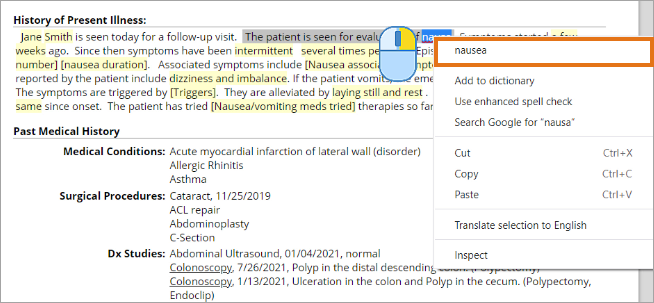
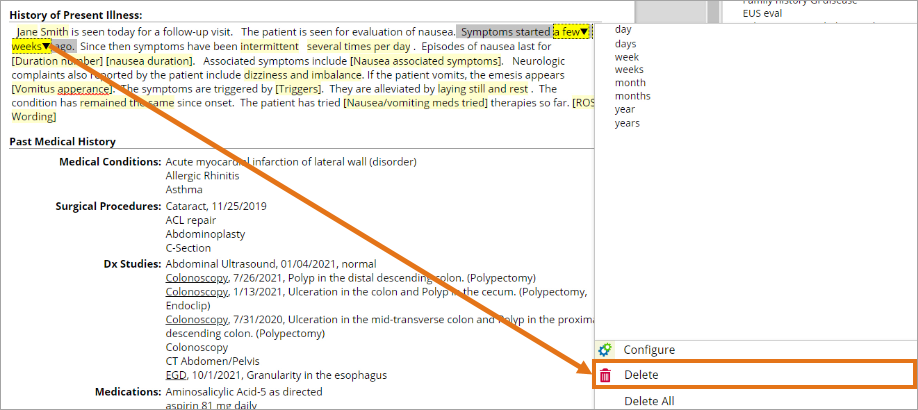
(I) Right-click on a misspelled word in the note and access the spell-check tool without highlighting.
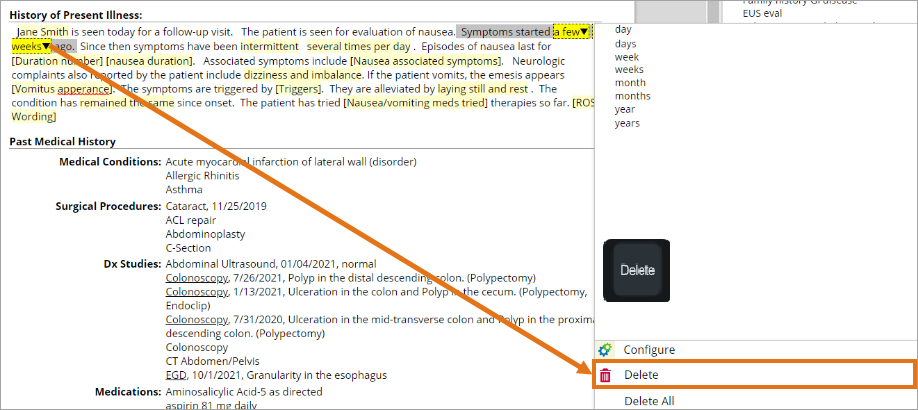
(II) Click on the Placeholder drop-down arrow, to delete or press the Delete key on your keyboard.
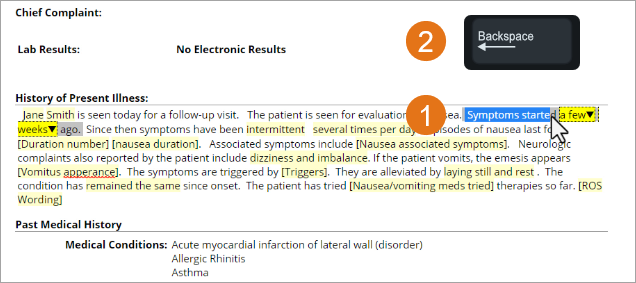
(III) Highlight any text, then Backspace to delete.
Step 3
Access User Preferences Document Spell Check.
Select the second option to be able to:
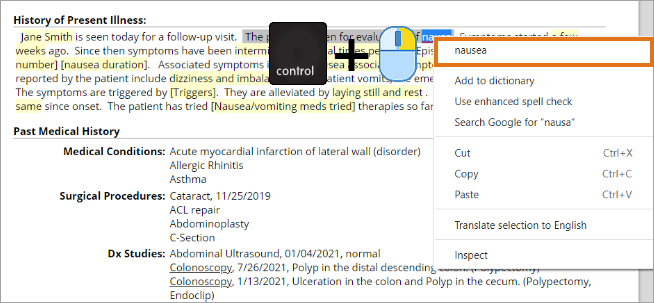
(I) Press Control and Right-Click on a misspelled word in the note to access the browser’s built-in spell-check tool.
(II) Click on the Placeholder drop-down arrow to Delete.
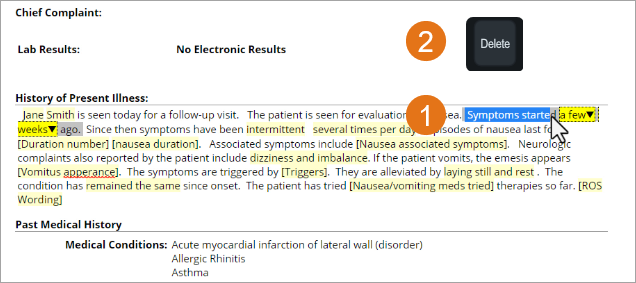
(III) Highlight the desired text, then press Delete to erase that content.
Click here to view a QRG on Right Click Spell Checking within the Application.